Showing posts with label Underpants. Show all posts

Tuesday, September 10, 2013

Aliens Abduction of an Underpants Expert

Is it a plane? ...no! It is a UFO!


Latest News : I'm no Expert!

Sorry, my super scientific pant-tastic experiment was side tracked because I was abducted by Aliens... They taught I was an underpants expert but figured out soon enough that I was just regurgitating info about underwear sewing gathered everywhere on the websphere! No worries, they came in Peace and, after some patterns and fabric swap, released me in the nearby Angrignon park...

I finally finished my simple 5 underpants, but I am far from the "underwear in 30 minutes" advertised by some... As always, the theory seemed clear in my mind, but the difference in elastic stretchiness and applications left me somehow baffled! What I found the most difficult was to determine the correct size needed.


Fantastic Elastics Scholastic

(1) FOE-picot, (2) Ruffles, (3) Holy picot, (4) Tight picot,  (5) Lace

At first, very optimistically, I bought only a strange Fold-over-picot elastic (1) and a ruffles elastic (2). After my first panties I realized they were far from adequate. I had to get some more : I chose 2 different kind of picot elastics (3, 4) and a 1 inch stretch lace (5).

I found that my fold-over elastic with a picot edge (1) was not stretchy enough. Cutting it the size of the super stretchy fabric resulted in unattractive flesh bumps (too tight). And cutting it the size of my body (a bit larger that the panties waist) resulted in wonky and droopy underwear. Its softness was equaled only by the lace. Maybe this one would be better with a less stretchy fabric, like Tshirt cotton jersey? I also guess that the size Medium might be too small for a fabric with less stretch...

The picot elastics (2 to 4) were perfect if cut to the correct size (about 2 inches smaller than the panties waist or leg hole) AND pined with at least 4 pins. I tried not measuring it and sewing/stretching as I go but, without the pins to control everything, the fabric stretched, resulting in a too loose opening. Finally, I tried to make a ring of the elastic and sew it in the round with 4 strategic pins ; this worked better.

Unraveling Picot
Moreover, elastics are not created equal ; All picot style elastic were easier to apply, but beware of the scratchy ruffles (2) elastic! Also, the picot with more space between the elastic part and the lacy picot (3) was difficult to attached in a seamless ring cleanly (picot loops unraveled at the join). Any tips are welcome!

I love the softness of the stretch lace (5), but mine had a tendency to roll if too stretched out. So it does not feel very secure (maybe my fabric is too stretchy) and can render a crotch very narrow depending how it is applied to the legs.

My messy lace application
Also, the stretch lace is very pretty on the outside, but I do not like to see the zig zag stitches and trimmed raw edge on the inside. And, last but not least, it was about twice as expensive at Fabricville :
  • 1.00$/m for the Fold-over-picot and ruffles elastic (1, 2);
  • 0.70$/m for the picot elastics (3, 4);
  • 1.90$/m for 1 inch stretch lace (5).


Finished Underpants Reviews

So Zo Undies
So, Zo... Panties

Pattern : Missing "So Zo" writen on pattern pieces. Some corner could have been trimmed.

Instructions : I didn't try sewing them flat, because I wanted one method to sew them all, but it make sense and might be easier for a first try since the elastic is easier to apply.

Fit : Personally, I find the crotch a little narrow. Hence, I chose the FOE to finish the legs holes to avoid narrowing it further by using the lace. I wasn't quite sure how to sew the lace without having to overlap it a lot and then cut the fabric underneath...
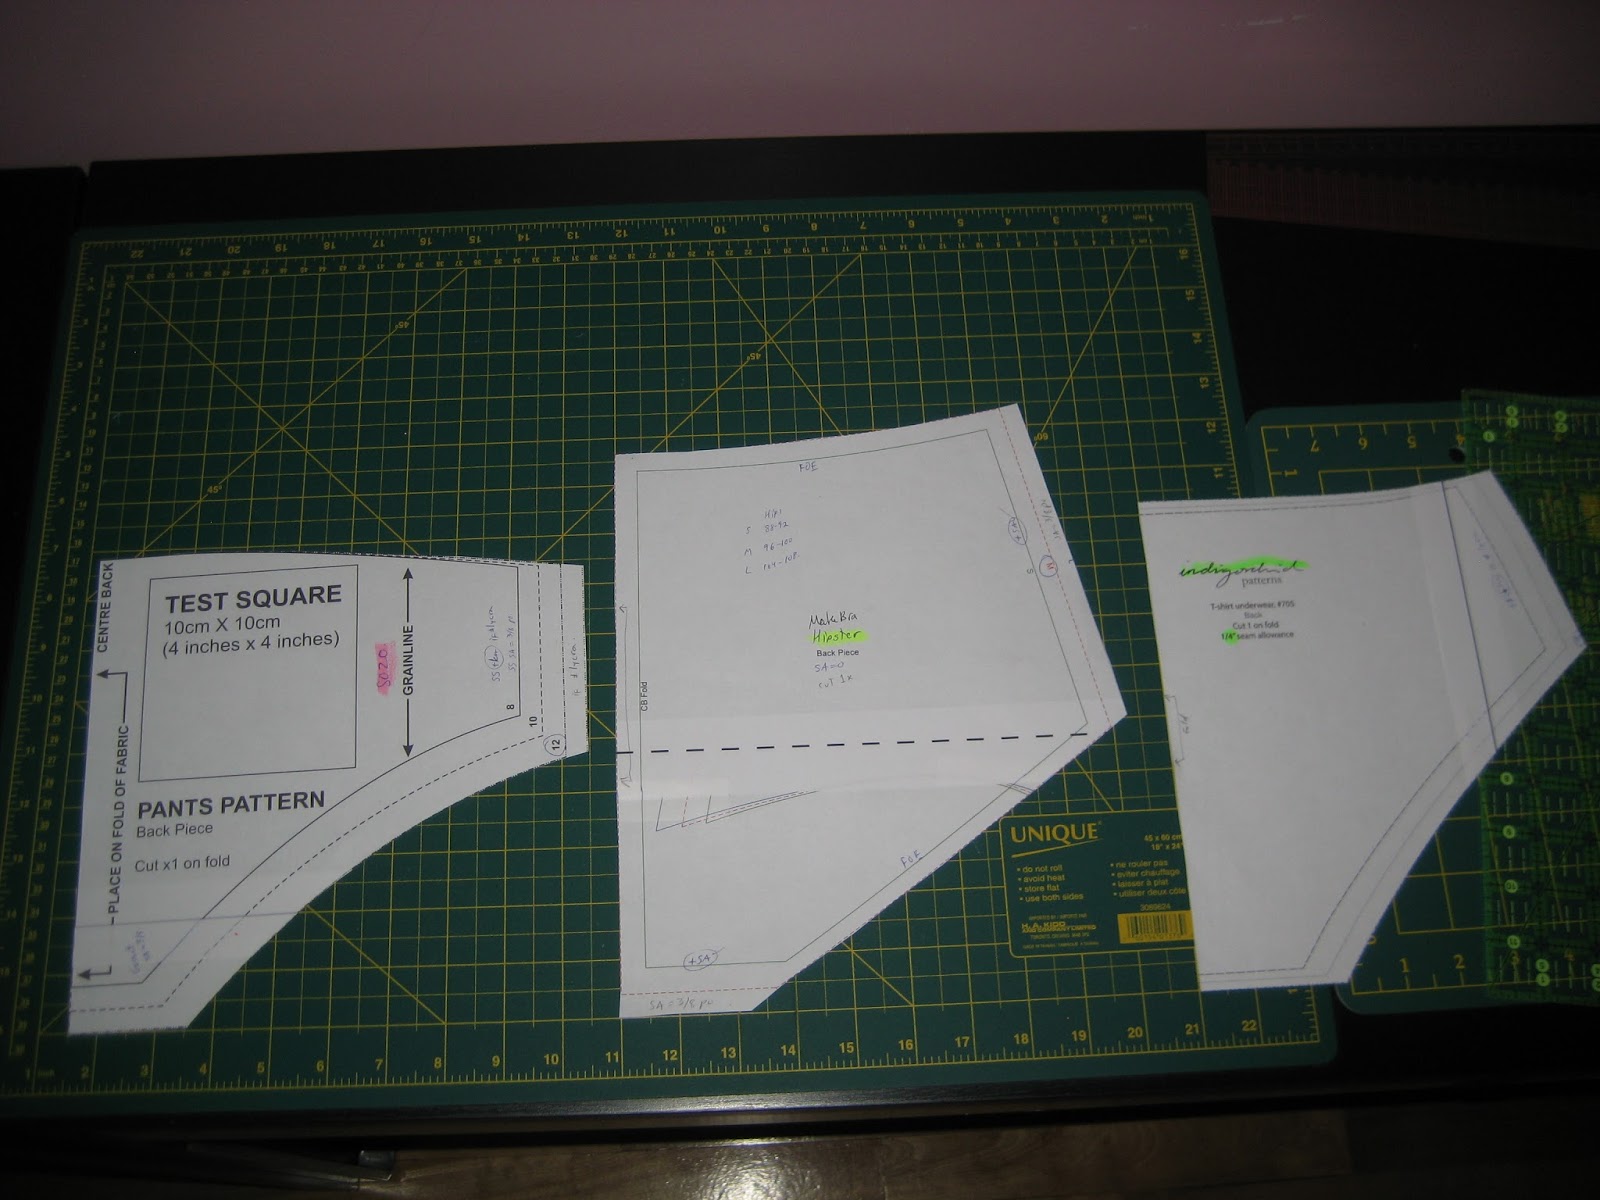


Make Bra Hipster

MakeBra's Hipster
Pattern : The PDF pattern have overlapping pattern pieces ; you then need to either trace them or print one page twice. It is not a big deal, just a minor annoyance because the pattern as only a few pages anyway.

Instructions : I tried the picot-FOE because they stretch the less and the instruction recommended not to stretch the elastic while sewing. But my application was not very good and I ended with a too loose waist by my own fault. I trimmed the top later and used picot elastic on the waist instead ; it is more confortable.

Fit : The waist hits in the middle of my little belly bump and tend to roll. After this picture, I removed about 1,5 inches from CF, CB and SS. I liked the bum coverage the most.


Indigorchid TShirt Panties
Indigirchid's T-Shirt Undies

Pattern : The panties is made from 3 pieces and a gusset lining, hence all crotch seams are enclosed.

Instructions : They were none in the PDF but she offer variations of elastic applications on her blog. I liked not having to finish the thin gusset front edge.

Fit : I love the fit! And I like that all seams are enclose in the crotch area.


Vera Venus Grannie-Pannie

VeraVenus Grannie-Pannie
Pattern : I like that it has fewer seams, only CB and crotch. When wearing it, so seams show through. But you need a little more room on your remnant fabric to cut the big pattern piece. And note that only 1 size is available.

Instructions : The instructions were minimal.

Fit : I love the fit! Waist exactly at my natural waist, nice bum coverage too.It is my go to panties to wear with panty hose, under skirts and dresses with a waist seam.


Ohhh Lulu Betty Panties
Ohhh Lulu's Betty Undies

Pattern : This is the only pattern I bought (9$). I was a little disapointed by the pattern itself ; varying line width from page to page and it did not aligned exactly on some pages. Some corner could have been trimmed.

Instructions : The instructions and sew-along were very complete. I still need to try one version with the front panel in a woven!

Fit : They are High waist so hit about 2,5 inches OVER my waist. I didn't liked it on my body, but the seams lines are very pretty because they curve at the waist. For my first pair, I just cut it on top at my waist, but I should try to get them at my waist and keep that sexy curve somehow...

For all my panties

I would have love for the patterns to indicate either the length of elastic needed for the leg holes and waist for each sizes ; I know this measure might vary depending on the fabric and stretchiness of the elastic, but it could be a good starting point!

Finally, I think I will lengthen the gusset piece on every pattern by about 1/2 in in the front.


Conclusion

If you are new to sewing underpants, I recommend to buy soft and stretchy picot elastic (or maybe some normal and stretchy FOE!) and an inexpensive stretchy knit fabric (or reuse old Tshirt). Starting with a free pattern seems easier to me than copying your favorite pair...

The experiment conclusion : I wanted to select one low rise and one high waist panties pattern. For the low rise, my favorite is the Indigorchid's T-shirt panties. They fit without alterations and have a neat finish inside will all crotch seams enclosed. I might cover the bum a little more by using the back leg opening from the MakeBra's hipster pattern...

For the high waist panties, I will keep both patterns! The Vera Venus Grannie-Pannie for an easy and fast panty to sew, kind of everyday skirt and dresses panties! The lack of side seam is a good choice under tight pencil skirts. I might use the Vera Venus for my first bikini bottom too because it is easy and it fit perfectly without further alterations. (awesome Bikini Inspirations)

I will also keep the Ohhh Lulu Betty pattern to experiment more! The Betty with it's numerous seams could have several very interesting and sexy variations with the use of different fabrics, sheer, woven, etc... I love the back seams of the Betty too and color blocking might offer a slimming optical illusion too. My favorite inspiration from this pattern is the Fuschia and floral set by Ohhh lulu! On her mannequin, the waist looks at the waist ; I am probably a Petite (1,59m/5'2") and should alter her pattern accordingly!

Vintage Jalie 2927
On a  personal note, I learned a lot about sewing stretch fabric and elastic during the experiment. For the less scientific experimentation that will ensue, I will use old Tshirt and try some normal FOE with my fabric too... I have a lot to experiment still!

Moreover, some Jalie patterns are calling my name ; the family undies pattern #3242 and the tight boxer short #2572 not for the tummy control, but to prevent chafing. My mother-in-law also gave me a vintage Jalie panty pattern from 1986 that I will try!

In closing, let me just state that I am very happy that all my trial panties ended up being more flattering and comfortable than my now too big maternity underpants that polluted my drawers for far too long...  Hint Hint to the kleptomaniacs Aliens - Please steal those away from me! ;)


 Did you miss anything on my Pant-tastic Mission?

Wednesday, August 28, 2013

Aliens Love (Sewing) Underpants

Sewing Underpants to Save the Universe!


Sewing Underpants 

A few days ago, I started a very scientific experiment to compare 5 different panties patterns. For everyone of them, I will be using the same fabric, same elastics and one generic method to sew them all! At this stage, I will be sewing the 5 panties without modifying the patterns, in a size medium. I even found a way to post pictures of myself in my undies while staying prim and proper!?!


Preparing to Sew

Cutting Nylon/Spandex
Like any long outer-space voyage, you need a minimum amount of preparation to sew underpants. First, I decided to prewash my fabric (even if nylon shouldn't shrink) and my black elastic because I read that those might bleed dye. You will want to use the same methods to wash them as you will after with your finish underpants, even a little rougher! I machine washed and dried mine.

Before revving your sewing machine, you need to cut your fabric. It is a good idea to cut the elastic when the panties are assembled, so you could better gauge how long it needs to be. You want snug but comfortable elastic at the exact location the panties leg/waist is going to be.

I have cut all 3 low rise panties (and the side pieces for the Betty panties) in about 24 inch of my 60 inches wide nylon/spandex fabric - I fold it 3 times to save fabric. I recycle an unworn nursing top for the 5 crotch liners ; this took a itsy bitsy amount of fabrics. I needed 21 inches of fabric to cut the rest of the 2 high waist panties. It took less than 3h at my snailstress pace... OK raw material is all ready, now what?


Underpants Sewing Methods Comparison

I always take a tour of the web-sphere beforehand to gather several methods to realize my project. Here is a summary of my research :
  • Very Purple Person Tutorial : (I WILL USE THIS ONE) Novita sew the panties then apply elastic to the legs and waist. Her instructions are very good if your pattern has a crotch in shell fabric too - all the seams end up enclosed under the gusset. Plus her visual are perfect, her fabric has a visible wrong side. She usually set her zigzag stitch on 2.5 in width and 1.5-2 in length. She baste the FOE before sewing it with 3-steps zig zag. Her tutorial include visual instruction for 3 types of elastic finishes : fold over, picot or normal flat ones.
  • So, Zo Tutorial  : Zoe usefully note that to refashion an old T-shirt without lycra/spandex/elastane, you need to increase the side seams (SS) by 0.5 to 1 cm. She sew the crotch, then the leg elastics, then only 1 SS, then the waist elastic and finally the last SS. She recommend very gently pulling on the leg elastics while sewing for a snug fit. SA = 3/8 in.
  • MakeBra's Hipster Sewing Tutorial:  Annele step by step instructions are similar to So Zo as she sew the crotch, then apply legs elastic, then SS and finally the waist elastic. She recommend NOT stretching the elastics with her pattern. I added SA = 3/8 in
  • Indigorchid basic instructions : Brigitte uses the same sandwich and roll method as Novita (Very purple person). She use the recycles T-shirt hem as casing with flat elastic in it at the waist. Then sew the SS with flat felled seams. And finally, uses picot elastic on the legs and stretch it slightly as she sews. extra instructions : Brigitte shows 3 different elastic application : Fold-over, regular flat and stretch lace. She uses the same methods as Novita for the FOE and regular flat elastic. For the lace, she recommend 1 or 2 row of zigzag with threads the same color as the lace. SA = 1/4 inch. 
  • Ohhh Lulu's Betty Sew A Long Posts : Sarah sew the panties and applies the elastic last, like Novita. She finish the gusset front edge first, then sew the crotch seam, then the 4 SS (due to front and back panels), then you can topstitch if your seams feel bulky, then baste the gusset and finally apply elastic pulling gently. She recommend cutting the elastic about 2in smaller depending of its elasticity.   SA = 3/8 in
  • Vera Venus's Grannie-pannie instructions : Her instructions are in the pattern PDF page 2. Since her pattern is different (2 pieces only), she just sew the CB seams (SA=3/8in), then the crotch seam (SA=1/4in), then finish the front of the gusset, then sew the gusset at the back, then stay stitch the gusset in place and finally attach the elastic to waist and legs using your favorite method.


My Sewing Method

I chose to use Novita's (Very Purple Person) tutorial to sew my panties, but to account for the particularities (like SA and elastic snugness) of all the patterns I will sew. Please refer to Very Purple Person Tutorial for stunning visuals!

How I will sew all panties :
  1. Finish all gussets front edge (except for Indigorchid)
  2. Sew and Finish all crotch seam(s) (SA=3/8in except 1/4in for Indigorchid and Grannie-Pannie)
    - Lay Front right side up
    - Lay Back wrong side up (Front and Back are right on right like a normal seam)
    - Lay gusset wrong side up (so the seam will be enclosed when flipped over)
    OR (just said differently)
    - Lay Front and Back right sides together
    - Lay gusset on top of Back, wrong side up.
  3. Sew and Finish all vertical seam(s) (SA=3/8in except 1/4in for Indigorchid only)
  4. Try on and cut elastics to desired length... (Hipster's elastic should not be sewn stretched)
  5. Baste and topstitch the legs opening with ruffles elastic
  6. Baste the FOE to the waist
  7. Change thread to black
  8. Topstitch FOE at waist.
Left : Finished seam + Right : RTW seam finishing and FOE

How I will sew my FOE to the waist :
  1. Right side facing up, put fabric on top of FOE, Align fabric raw edge to FOE middle
  2. Pins at strategic interval to distribute the elastic.
  3. Baste while making sure the fabric is attached all around.
  4. Close the FOE ; should not see stitches on right side.
  5. Topstich the elastic.
How I will sew the Ruffles or Picot Elastic to the legs :
  1. Put elastic on top of the fabric right side, ruffles/picot facing away from raw edge. Alight elastic straight edge to raw edge of fabric.
  2. Pins at strategic interval to distribute the elastic.
  3. Baste closest to the picot/ruffles edge.
  4. Turn the elastic under ; ruffles/picot should peek outside.
  5. Topstich the elastic.
Left to right : Ruffles elastic at legs + FOE with picot edge for waist


My Sewing Machine Settings

I always do a a test run with my fabric scraps to test the all the methods I am going to use and note the result down. I used a Schmetz stretch needle, size 75/11. I own a Singer Quantum Stylist 9960. Here are the stitches on my machine for references :

My Raw Material :
  • Fabric : Light pink nylon/spandex
  • Lining : Dark pink 100% viscose recycled top
  • Elastic : Black FOE-picot for the waist and Ruffles for the legs. 
  • Threads : Guttermann in pink and black. I sew everything in pink up until the last step to close the FOE elastic at the waist in black.
My Stitching Settings :
  • Seam : #7+ change length to 2.0 (instead of 2.6). Try to vary the length or the tension until your thread do not break when you stretch a seam with your hand.
  • Finishing : #16 + change length to 2.2 (instead of default 2.6) + Fabric rolls on wrong side.
  • Lining Finishing : Same as finishing, but for single layer use silk paper under the fabric.Tear away after sewing. I recycle the paper from gift bags and cut it in about 1in strips to use to stabilize lightweight fabric... Maybe starch would do the same?
  • Elastic Basting : #7
  • Elastic Topstitching : #12 + augmenting tension to 12 (instead of default 6). Try it on your machine because a too loose stitch will be very uncomfortable on your skin. 

Stitches #7, #16 and #12


Resulting Underpants

I finished to assemble all panties, but I decided to keep sewing the elastic after assessing the fit, since I still want to end up with 5 wearable pairs. Hence, I will compare them without the elastic first, adjust them and sew the elastics on to finalize my pant-tastic scientific experiment! Of course, in no way I am judging the quality of the pattern, just merely the size and shape of the half sewn pattern in my chosen fabric. It might help some readers to choose a pattern in particular if its closer to your favorite underpants! Here is the visual comparison :

Low Rise Panties Comparison

  • Make Bra Hipster, size M
  • So Zo panties, size UK12
  • Indigorchid T-Shirt panties, size M

Left to right : Hipster + So Zo + Indigorchid

Bottom to top : Hipster + Indigorchid + So Zo (folded)

High Waist Panties Comparison

  • Ohhh Lulu Betty High Waist Panties, size Hips 40-41 inches
  • Vera Venus Grannie-Pannie, size UK10-12
Below : Ohhh Lulu Betty + Top : Vera Venus Grannie-Pannie

Left : Ohhh Lulu Betty + Right : Vera Venus Grannie-Pannie

Photo Comparison on a Human


Here are my measurements, in case you want a better idea how they fits :
  • High Bust : 38 in
  • Bust : 40 in
  • Waist : 33 in
  • Hip : 40 in
  • 5ft 2in and 160 lbs


1: So Zo, 2: Indigorchid, 3: Hipster, 4: Vera Venus, 5: Betty

1: So Zo, 2: Indigorchid, 3: Hipster, 4: Vera Venus, 5: Betty

1: So Zo, 2: Indigorchid, 3: Hipster, 4: Vera Venus, 5: Betty


Did you miss anything on my Pant-tastic Mission?


    Saturday, August 24, 2013

    Guide to Earth's Underpants Making Resources

    No spaceship needed, YOU can make underpants!

    Image source
    As we all know, Aliens loves underpants to make upside-down pants races... But because they never realized they could make them themselves, they come to Earth to steal our bloomers from our drawers.  Hence, to avoid any more Earthlings with an empty underwear drawer at 6am on a  frantic Monday morning, I decided to help the Aliens make their own. Of course, they will still need to buy (or zap from outerspace) some raw material and tools from Earth, but every Alien can make their own panties!


    Fabrics and Tools

    • Tools : A sewing machine with a  zig zag stitch and a stretch needle (works better than a ball point needle). A rotary cutter and self healing mat helps cut stretchy knit fabrics, but is not necessary.
    • Elastic : You have a lot of type of elastic to choose from, but try to keep them narrow. Fold Over Elastic (FOE) for a stream line clean finish, normal flat elastic to be hidden in a turn of cloth and/or some picot edge decorative elastic to peek-a-boo on the edges! Even stretch lace can be used to bound the edges.
    • Lining Fabric : The crotch pieces needs to be made of a soft and breathable natural stretchy fabric (per example, cotton jersey). Think about recycling those unworn T-shirt or stretchy cotton remnants! 
    • Shell Fabric : Depending on the pattern, the underpants can be made out of :
      - knits (jersey, interlock, micro knits, tricot, old T-shirt, etc),
      - stretch woven or lace or even velvet (with lycra/spandex/elastane mixed in)
      - woven cut on the bias (satin, charmeuse, chiffon, etc).
      Favored fibers are silk, cotton, rayon (viscose, tencel, modal, bamboo, etc), merino wool, nylon, microfiber and some sports underwear use polyester to keep the athlete dry. All those fibers accept dye well, except for polyester.
    Every pattern I found recommend about 1/2 yard (0.5m) of fabric 115cm/45in wide. For a wider fabric, say 150/60in wide, I could squeeze 3 pairs of low rise panties in 60cm or 2/3 yard.

    For the elastic, you need enough to wrap around both your tights and your hip/waist depending on the pattern. For a size medium, I calculated about 2m/ of elastic per panties.


    Underpants Patterns

    A lot of tutorial exist on the web to draft your own pattern by copying a pair you really love. Some offer tips to copy your favorite panties without cutting it apart (here) while other take the cut away approach (here). But if you would like to try a patterns, here are the some downloadable that I found lately :

    Free Underpants Patterns

    Independant Patterns Designers
    • Bra Makers Supply : Canadian Ottawa based one stop shop for your lingerie patterns and books!  Patterns about 20$. Etsy shop for patterns and online shop for everything lingerie related.
    • Merckwaerdigh sells lingerie patterns and supplies, like lace, underwires and bra kits. Pattern about 15$
    • Mrs. Depew : Californian vintage looking lingerie and garment pattern designer. She have about 50 vintage lingerie patterns as knickers, bra, corset, garter belt, slips, etc. Pattern bout 8$
    • Ohhh Lulu : Canadian Ontario based designer that offer more than 7 panties patterns on both Ohhh Lulu Etsy shop and via the Craftsy website. Pattern about 9-12$.
    Established Pattern Companies
    • Jalie : Canadian Quebec based company that offered patterns for more than 30 years! They are the only one with a family friendly multi-sized multi-style pattern that fit both male and female from 12 months to an adult size 22. Retails about 12$ per pattern, some can be downloaded. Their patterns are loved on patternreview.com.
    • Kwik Sew : They offer a dozen of lingerie patterns, almost all with panties. Comments gathered around the webshpere says their crotch pattern piece runs wide. About 12$ per patterns, some can be downloaded.
    • Burda Style : Burda offers a little more than a dozen of lingerie patterns (2 panties) at a low price of 5.40$ each.


    Underwear Fabrics Sources

    Most obvious places to get suitable underwear fabrics are your unworn garment drawer, your local fabric store (Fabricville, Fabricland, Jo-Ann, etc.), thrift stores for used T-Shirt or bargain fabrics and online fabrics stores... Here is few of the stores specializing in lingerie:
    • Merckwaerdigh sells lingerie patterns and supplies like lace, underwires and bra kits.
    • Bra Makers Supply : Canadian Ottawa based one stop shop for your lingerie patterns and books!  Patterns about 20$. Etsy shop for patterns and online shop for everything lingerie related. Very good Canadian source.
    • Sew Sassy : They offer fabrics for lingerie, bra and swimwear as well as the Elan and Kwik Sew bra patterns. Very liked in the online sewing community I think.
    • Bravo Bella : They offers yardage but also bra and panties kits in cotton, satin or tricot in a rainbow of colors.
    • Booby Traps : An Australian company selling yardage and bra kits. I remember seeing their name in the websphere a lot, I love their name!
    • Dharma Trading Co. : They offer fabrics made of silk, bamboo, cotton, nylon, hemp fabrics and even pineapples!! Their prices are very low, but please note that all their fabrics are black or white. All white ones can be colored by their dyes and paints. 
    For more sources, please visit Dixie DYI website, she offers an extensive guide for bra making, with International fabrics and notions suppliers, recommended patterns, good tutorials and reference books!

    In Montréal : You can found pretty and inexpensive knits at GlobalText on St-Laurent and Chabanel, 2 notions and trims stores and several suitable stores on St-Hubert Street, North of Jean-Talon. See my Montreal's Fabric Store page for more info.

    You might find a little bit more on my "Sewing - Underwear" Pinterest board...


    Did you miss anything on my Pant-tastic Mission?


    Thursday, August 22, 2013

    Underpants, so Stretchy and Elastic, it's Fantastic!

    I must be an alien...

    Sounds crazy but it's true!
    Why? Well, because aliens love underwear, isn't it? My son's favorite books are "Aliens Love Underpants" and "Alien in Underpants Save The World" : very funny books about aliens stealing underwear on earth and saving our planet in the meantime! I love those books too, not just because they are well illustrated and funny, but because they helps tremendously in convincing my 2 year old to sit on the potty!

    Anyway, all that to say that I decided to sew my own underpants... I announced it casually to a friend of mine yesterday and she answered in disbelief : "But, why?" Well, it might be partly because I love to learn new sewing techniques or that I aspire to an entirely handmade wardrobe or because my under things drawers is looking very sad... But lets not go there!


    Order in my Madness

    So... How does my engineer mind, surely mixed with an healthy dose of OCD, approach this new challenge? By researching the subject extensively for a few sleepless nights ; I made a Pinterest board of the most promising patterns and tutorials. Then I settled on 3 low rise panties and 2 high waist panties patterns. Eventually, I bought 3m of very soft pink nylon/spandex and 16m of fantastic plastic elastic to sew and scientifically compare them all in the next few posts. I intend to use the picot edge FOE (on top) for the waist band and the ruffled flat elastic for the legs.

    Fabric, threads and elastic

    Acronyms

    CF = Center Front
    CB = Center Back
    SS = Side Seam
    SA = Seam Allowance
    FOE = Fold Over Elastic
    UFO = Unknown Flying Object or UnFinished Object!


    I'm a Low Rider ♪

    I don't know if you are like me, but at the slight hint of a sentence being similar to some lyrics, the song starts to play in my mind! Lets not digress, here are the 3 low rise panties patterns I chose for my experiment :


    So Zo's Famous Pants

    So, Zo... Panties
    Link to Pattern
    Price : free, but link to buy her a coffee through Paypal!
    Format : PDF download, 4 pages,  test square included.
    Pattern : 3/8 inch SA at SS and gusset. Recommend FOE for waist and legs, so no SA there. Grain line included.
    Sizing : This pattern includes UK sizes 8 -16. A chart of the equivalence between international sizes is provided, but no measurements to help choose your size. I just compared the pattern pieces to my favorite panty and select the closest size.
    Suggested Fabric : 60cm/1y of jersey or recycle 1 large T-shirt, 2.5m/3y of FOE.
    Instructions : No instruction in the PDF, but at least 2 posts about how to sew them on her website : no serger and flat elastic and another post to build them using a serger and FOE.


    Hipster from MakeBra

    MakeBra's Hipster
    Link to Pattern
    Price : free
    Format : PDF download, 3 pages with overlaps, no test square.
    Pattern : No SA included. I added 3/8 inch to SS and gusset. The pattern pieces overlaps, so tracing or printing one page twice is in order. There is minimal text on the pattern pieces.
    Sizing : S to XL, a measurements chart is provided on her website (in cm).
    Suggested Fabric : 2 way stretch cotton jersey and lycra.
    Instructions : No instruction in the PDF, but a short list of steps is provided on her website.


    T-shirt Undies from Indigorchid

    Link to Pattern
    Indigirchid's T-Shirt Undies
    Price : free
    Format : PDF download, 4 pages,  no test square.
    Pattern : 1/4 in Seam allowances, but do not state where. No grain line. The crotch piece is different from the other pattern : larger shorter rounder and not to be cut on the fold.
    Sizing : XS to L. No measurements to help choose your size. I just compared the pattern pieces to my favorite panty and select the closest size.
    Suggested Fabric : Recycle 1 T-shirt. Stretch lace or FOE or elastic piping (picot?).
    Instructions : No instruction in the PDF, But at least 2 posts about how to sew them on her website : Sewing underwear the basics and the extras.


    Low Rider Patterns Comparison 

    I took pictures of all the 3 pattern pieces for each of the 3 low rise panties patterns (click to see a bigger image). Note that Indigorchid T-shirt panties will have 2 seams around the crotch on the outside. So Zo version will be a bikini style with narrower crotch. And finally, the MakeBra pattern, being a Hipster style panties, offers more coverage for the behind and a lower cut for the legs.

     
    Crotch : So Zo, MakeBra, Indigorchid.

    Back : So Zo, MakeBra, Indigorchid.

    Front : So Zo, MakeBra, Indigorchid.


    Sexy Pinup High Waist Panties

    Not as glamorously also known as the granny panties! In spite of few sewing bloggers stating that those panties where not enthusiastically admired by their partners (evidences here and here), I love their vintage vibe. Moreover, they are just perfect under a skirt/dress with a waist seams and I dream of a bikini with an high waist bottom and a top made from a real bra pattern...


    Ohhh lulu's Betty High Waist Undies
    Ohhh Lulu's Betty Undies

    Link to Pattern
    Price : 9$ (from Craftsy, soldout on Etsy) I bought this one because I love the lines drawing so much...
    Format : PDF download, 12 pages,  no test square.
    Pattern : 4 pattern pieces. 3/8 inch SA. I had more trouble assembling this one as the line are not the same width and sometimes forms an indent...
    Sizing : XS to L by hips measurements interval. Go up a size if using woven in CF/CB panels.
    Suggested Fabric : Jersey knits, stretch lace, interlock, tricot, stretch satin, powernet, 4 way stretch fabrics. 1/2y in Stretch knits for sides and 1/2y of stretch knits or bias woven for the CF/CB panels. 1/4y jersey knit for crotch lining. 2y of elastic.
    Instructions : Provided in the PDF - font is too small for me in print form. She also offer a Sew Along:
    1- Supplies needed
    2- Sewing your muslin
    3- Sewing seams and crotch lining
    4- Finishing edges with elastic


    Vera Venus Grannie-Pannie

    VeraVenus Grannie-Pannie
    Link to Pattern

    Price : free
    Format : PDF download, 8 pages, no test square.
    Pattern : Only 2 pattern pieces, solo seam at the CB. SA included, not indicated how wide. Direction of the most stretch indicated.Lots of useful annotations.
    Sizing : One size, UK 10-12 (hips 37-39 inches) I have 40 inches hips and 33 inches waist, I figured I could make them work... She offers a link to a Threads "Pattern Grading" article.
    Suggested Fabric : 50cm/20in of 112cm/45in wide fabric in 1 or 2 way stretch fabrics. Approximately 160-170cm of lingerie elastic. Silk,
    Stretch lace/mesh, cotton, nylon or rayon jersey. Woven on the bias will NOT work.
    Instructions : She included a short steps list in the PDF.


    High Waist Panties Patterns Comparison

    I cannot make a comparison of the high waist panties for each pattern pieces since they do not have the same lines drawing (Betty 4 pieces and Grannie only 2). But I will show each of them separately and once partly on top of one another. The gusset piece is similar to the T-shirt undies from Indigorchid. The Grannie-Pannie by VeraVenus is interestedly drafted with one CB seam ; but I am not sure how I would grade them... Next step, cutting and sewing!

    VeraVenus's Grannie-Pannie (with Indigorchid gusset)

    Ohhh Lulu's Betty Panties

    Betty (top) vs Grannie-Pannie (under)